
Visible Mending for Beginners: Which Mend to Use and How to Do It
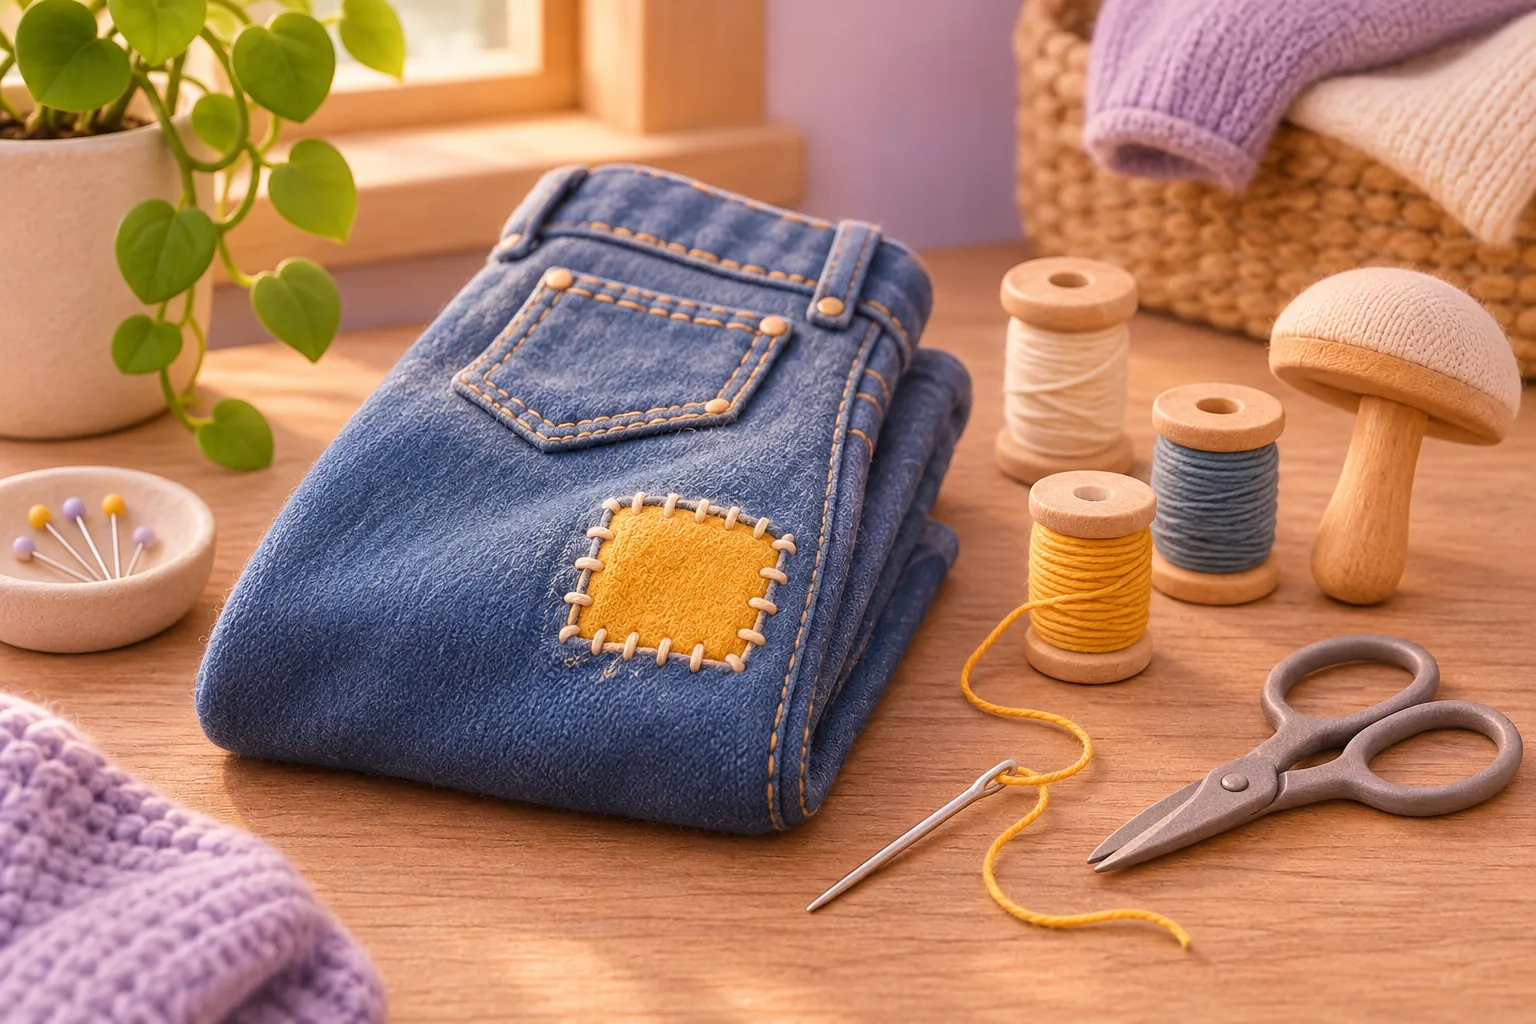
Let the damage pick the mend. Patch it when the damage is large or can't be darned. When it's small, you can darn it, as a 1943 USDA bulletin suggests. Darning means weaving your own patch from thread or yarn. Back a thin spot with fabric before it wears through, and close a split seam with a backstitch.
For a first patch or darn you only need the running stitch, the dashed line you get by taking the needle up and down through the fabric.
Whether it shows is up to you. Visible mending makes the repair part of the look, with thread, fabric or decorative stitching you're meant to notice, so a patch or a darn can go in a color that stands out.
This guide doesn't teach sashiko, but the running stitch gives you a head start on it: that traditional Japanese style strengthens fabric with patterns worked in the same stitch and a particular kind of cotton thread.
Match the damage to the mend
| What you see | The mend |
|---|---|
| A thin spot, no hole yet | A patch on the inside, or on a knit, a darn on the inside (1943 USDA advice) |
| A small hole in a woven, like jeans | A darn or a patch |
| A small hole in a knit, like a sweater or sock | A darn, woven across or pulled closed |
| A bigger hole | A patch |
| A split seam | A backstitch |
Wondering if the piece is too worn to bother? See when a mend may not be worth it.
There's no fixed size for "small"
Knits tend to get darned and wovens like jeans tend to get patched, but nothing says they must. None of the guides used here gives a size where a darn becomes a patch, so use your eye.
A little hole on a sweater cuff, with sound fabric around it, is a job for a darn. A rip across the knee of your jeans, with worn fabric around it, is a job for a patch. If you could go either way on a woven, pick what you'd like to look at: a small block of woven thread, or a piece of fabric you love.
What to have ready
- Two needles will do: an embroidery needle, which fits thicker thread, for patches and general stitching, and a tapestry needle for darning knits with yarn.
- Pins and small scissors.
- Regular or embroidery thread.
- Some yarn for knits.
- Scrap fabric for patches, which can come from old clothes.
Try to match your mending materials to the piece in fiber and weight, which leaves color as the part to play with. It needn't be a perfect match. The aim is to avoid a big difference, like a thin, floaty silk on denim.
Not every fabric behaves the same way in the wash, and a mismatch can pucker, so it can help to pick a mending material that washes the way the piece does. Fiber artist Arounna Khounnoraj, for example, picks wool yarn for a wool sweater so the two behave alike in the wash. Once it's mended, the piece's care label is still your guide for washing.
For a thin spot, back it with fabric
A worn spot can turn into a hole, so don't wait. A backing patch is a good way to stop that happening, and it suits a favorite pair of pants that's wearing thin.
- Cut sturdy fabric into a patch that reaches a little past the most worn part.
- Turn the piece inside out, pin the patch in place and sew it on in running stitch. The thinner the fabric, the more of the patch you may want to cover with stitching. In a noticeable thread, your stitches are what will show on the outside.
The 1943 USDA bulletin offers a darn instead: back the thin spot with the same or a similar fabric, then darn back and forth across it and a little past it. On a knit, it says to do the darning on the inside, and the weaving method shows how the thread goes.
For a small hole in a woven, try a darn
These steps shorten the North London Waste Authority's darning sheet, which says small stitches make a strong mend that barely shows. For a visible one, use a thread that stands out.
The left drawing shows the first rows running up and down, with thread lying loose across the hole. The right one shows the side-to-side rows, which go over and under those threads at the hole. The rows are spread out and in two colors so you can tell them apart. Sew yours right beside each other, in one color or two.
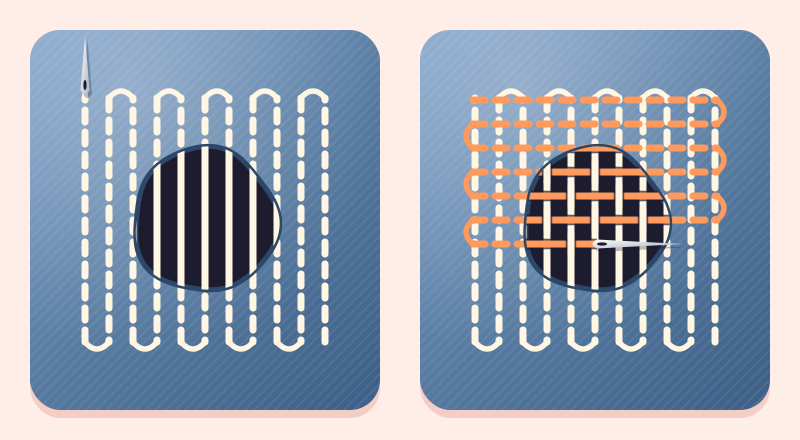
Before you start, trim off any ragged edges but keep the hole's original shape, as the 1943 USDA bulletin advises.
- Thread a needle with about 40 cm (roughly 16 inches) of thread and knot the end of one strand.
- Start 1 cm (about 3/8 inch) to the right of the hole and 1 cm beneath it. Push the needle up through the fabric and make small stitches in a straight line until you're 1 cm above the hole.
- Sew the next row directly beside it, going downward. Keep making rows, moving left, and let the thread lie loose across the hole with a tension similar to the rest of the material. Stop 1 cm to the left of the hole.
- Stitch a few times on one spot, cut the thread and thread the needle again.
- From the top left-hand corner, make small stitches side to side across the darning area. At the end of the row, reverse direction, and at the hole, take the needle over, then under, each up-and-down thread.
- On the next pass, weave the opposite way, so the rows alternate, and don't worry if it isn't exact. Keep going to the bottom of the darning area, then finish underneath as you did in step 4, stitching a few times on one spot and cutting the thread.
For a small hole in a knit, darn it one of two ways
The 1943 USDA bulletin warns that snags and breaks in a knit stretch into holes, so catch them while they're small. Put something stable underneath, like a darning mushroom, tennis ball, mason jar or ladle. Then pick one of these two ways.
Weave across it
Use yarn for this one. A basic darn is just a grid of straight lines, running up and down and side to side across the fabric and the hole. That's the idea behind the woven darn steps, and the sheet they come from names a sweater as well as jeans.
Pull it closed
For this method, use a needle and thread. It comes from a wool guide written around socks, which says it also works on wool sweaters.
- Pull the piece inside out over a tennis ball or darning egg, and snip any stray threads.
- Work up the hole's edges in running stitch, going back and forth.
- Near the top of the hole, space your stitches closer and closer, then tug the thread gently until the hole shuts. Tie a knot and snip the end.
To choose, think about what you want to see. Weaving leaves a block of thread you can make a feature of, and closing leaves less to look at. If closing makes the knit bunch up, unpick it and weave instead.
For a bigger hole, sew on a patch
These steps also work if you picked a patch for a small hole in a woven, like jeans.
- Clean the garment first.
- If your patch fabric is new and the piece has been washed or dry-cleaned, wash and dry the new fabric first, or it may shrink and pucker once it's sewn on, the 1943 USDA bulletin warns.
- Trim the damage back to a square or rectangle, which makes the patch easier to put on and sew.
- Cut the patch at least an inch larger than the hole on every side.
- Lay the patch over the damage and pin it, then sew back and forth across its edges and a little beyond them, in lines of running stitch.
Other guides ask for less, about 1/4 to 1/2 inch. An inch gives you more sound fabric to stitch into, so start there unless you're short of fabric.
Kate Sekules, author of a book on mending, calls a patch stitched this way really durable, and says a pretty patch fabric with a contrasting thread enhances it even more.
The patch can go inside instead: turn the piece inside out and pin it behind the rip, lined up with the fabric's grain. Sew it on in lines of running stitch. You'll then see the hole's edges and your stitches, not the whole patch. If the fabric around the hole is worn too, you can use a much bigger patch so the damage doesn't spread, and sew the hole to it to hold up the worn fabric.
For a split seam, backstitch
- With the piece inside out, knot the loose threads around the seam.
- Read the label for the fiber content and pick thread of the same fiber.
- Start about 1/2 inch before the break and secure the thread there, through both layers of fabric.
- Working along the seamline, bring the needle up through both layers. Go back down about 1/16 to 1/8 inch behind that point, then come up the same distance ahead of it. From there, each stitch goes in at the end of the last one and comes out one stitch ahead.
- Finish with a short backstitch and, if the care label allows ironing, press the seam.
When a mend may not be worth it
Before you start, ask how much damage there is, whether you have the skill or need someone else to do it, how long the repair will take and whether you'll wear the piece afterward.
For worn pants, Make: magazine's patching guide gives a quick test: hold them up to the light, and if plenty of light comes through, they may not be worth patching. You could reuse the fabric for something else, it adds, or patch anyway and hope for a few more wears from a piece you treasure. So how much you love the piece still counts.
If several pieces are waiting, your next seasonal closet swap is a natural time to work through them. Ezfit, a smart digital wardrobe coming soon to iPhone and Android, will suggest restyle or repair ideas for clothes you no longer wear.
Sources
- Activity 10: Repair Your Clothes: Save Money and Look Great (Caring for My Clothes) (PDF), University of Tennessee Extension, 4-H, 04/20
- ABC's of Mending (Farmers' Bulletin No. 1925) (scanned text), U.S. Department of Agriculture, Revised September 1943
- The perfectly imperfect art of visible mending: A beginner's guide, NPR (Life Kit), May 22, 2023; updated February 9, 2025
- Patch 101, Make: magazine, March 18, 2009
- darn it! how to repair a hole (PDF), North London Waste Authority
- How to repair wool, The Woolmark Company
- Ezfit home page: Second life section, Ezfit